How to Scan Cover Art
This is a guide for scanning and editing cover art with GIMP. I also use the Resynthesizer plugin (Resynthesizer for Windows) for GIMP.
You can scan images right from the GIMP. Go to File → Create → Scanner/Camera…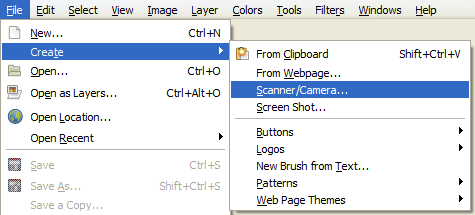
After (optionally) selecting your scanner as the source, you’ll be presented with a new screen:
To the right, click on the tab Advanced Mode (1). Set the Output Resolution to 600 dpi (2), then click on Preview (3).
Some notes:
- I usually don’t bother with neatly aligning what I am scanning on the scanner, I just rotate it afterwards.
- Scanning at 600 dpi may seem overkill, but in my experience scanning at a high resolution is the best way to avoid moiré patterns. Scanning in this resolution doesn’t take that much longer on a modern scanner, but it does create large files to work with, which may create problems on computers with low RAM.
- After completing the preview scan, GIMP automatically selects a part of the scanning area to use for the real scan. I usually find that selection to be a bit tight though, so I always draw a slightly bigger one.
- The options under Image Settings give some possibilities for automatic adjustments. I prefer to do those myself later (if at all), so I usually leave them off.
When you’re satisfied with all the settings, click Scan (4).
If the image is not yet horizontal, you can rotate the image with the Rotate Tool (highlighted) and dragging anywhere on the image. Aligning is quite easy if you zoom in and use the Rotate dialogue as a ruler along with a part of the image which should be horizontal or vertical (like an edge or a line of text). An alternative is to use the Measure Tool (on the far left, looks like a drafting compass) to find the exact angle of a straight line, and then type that in as the rotate angle (as a negative number if the rotation is counterclockwise).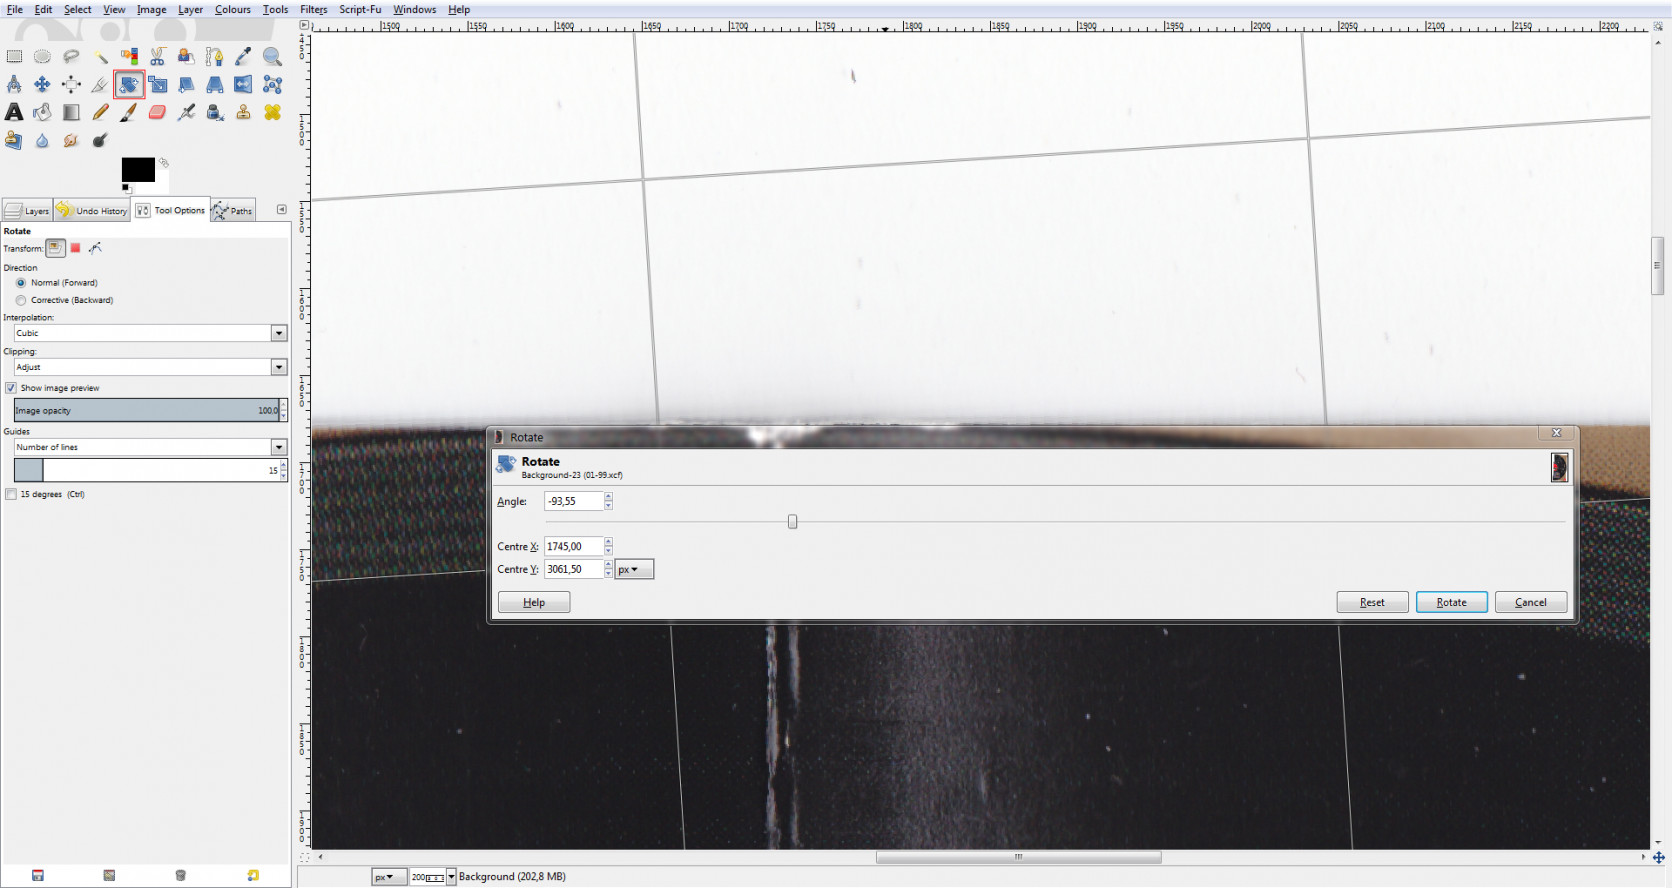
When you zoom out again, you’ll notice that some bits are missing. Image → Autocrop Image will solve that problem.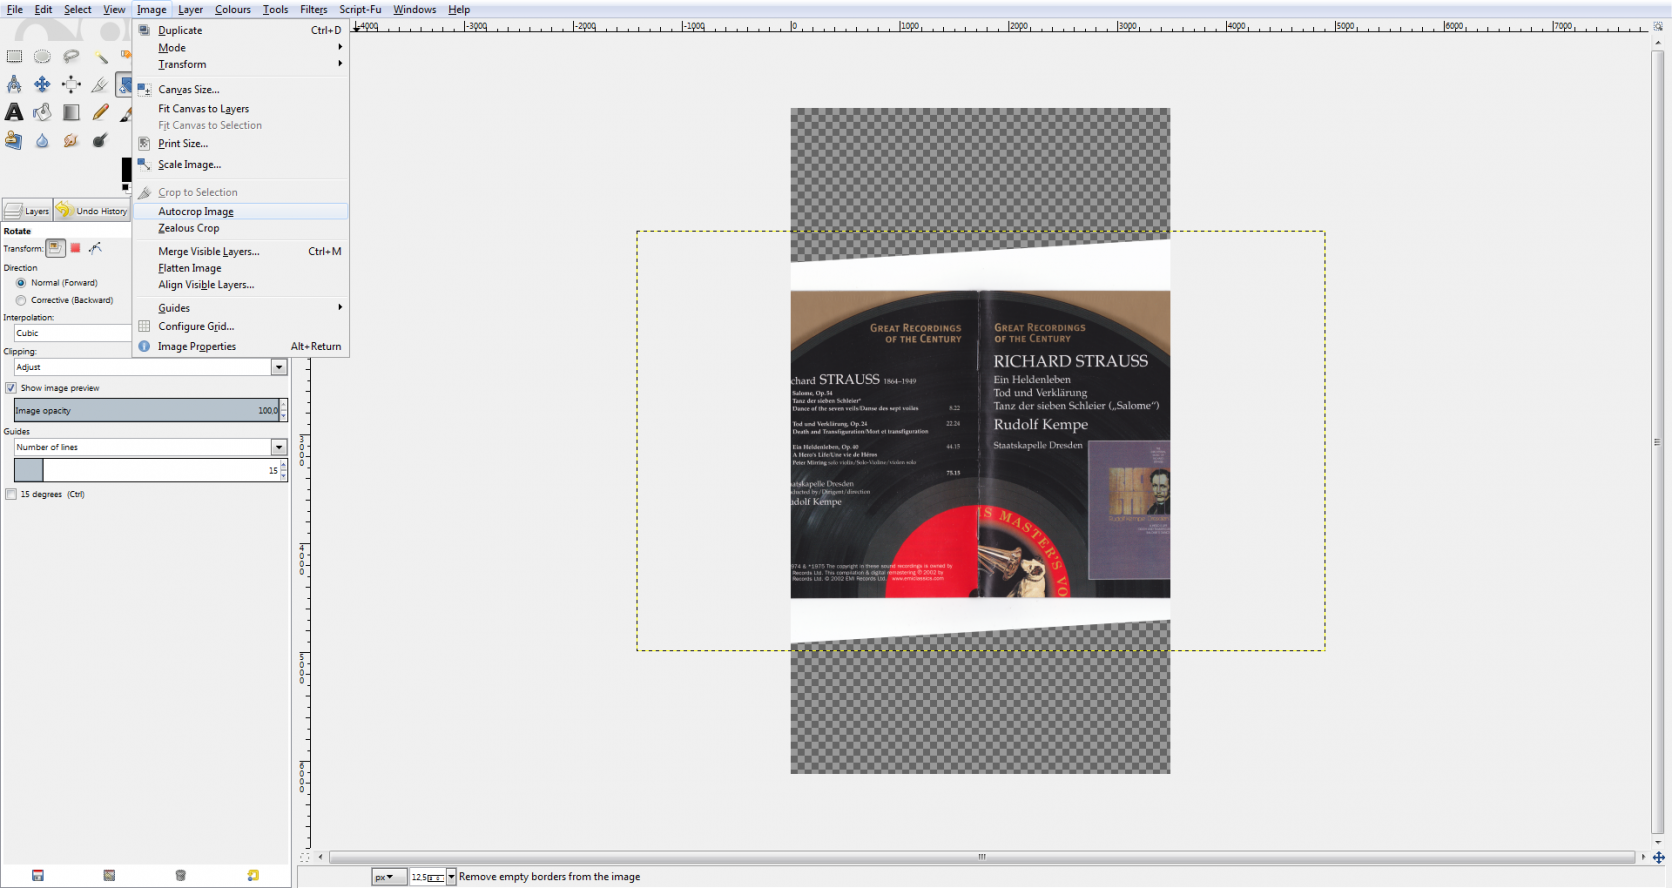
We still have a transparency (alpha) layer. Since we have no use for it and it does take space in the final image, we’ll just remove it: Layer → Transparency → Remove Alpha Channel.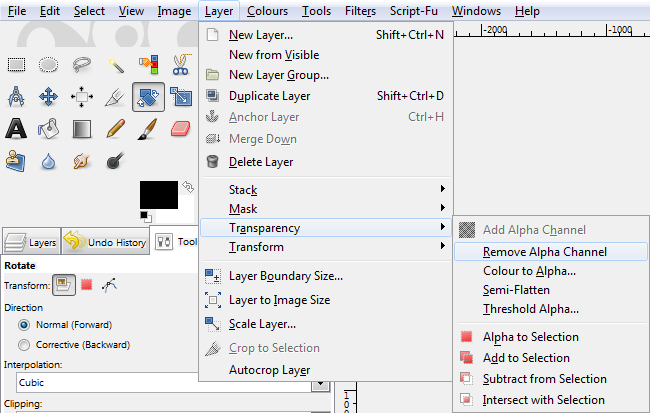
Next is cropping the image: Select the Rectangle Select Tool (1), draw the part of the image you want to crop to (you can resize the selection later by dragging the handles) (2). When you’re happy with the selection, go to Image → Crop to Selection (3). 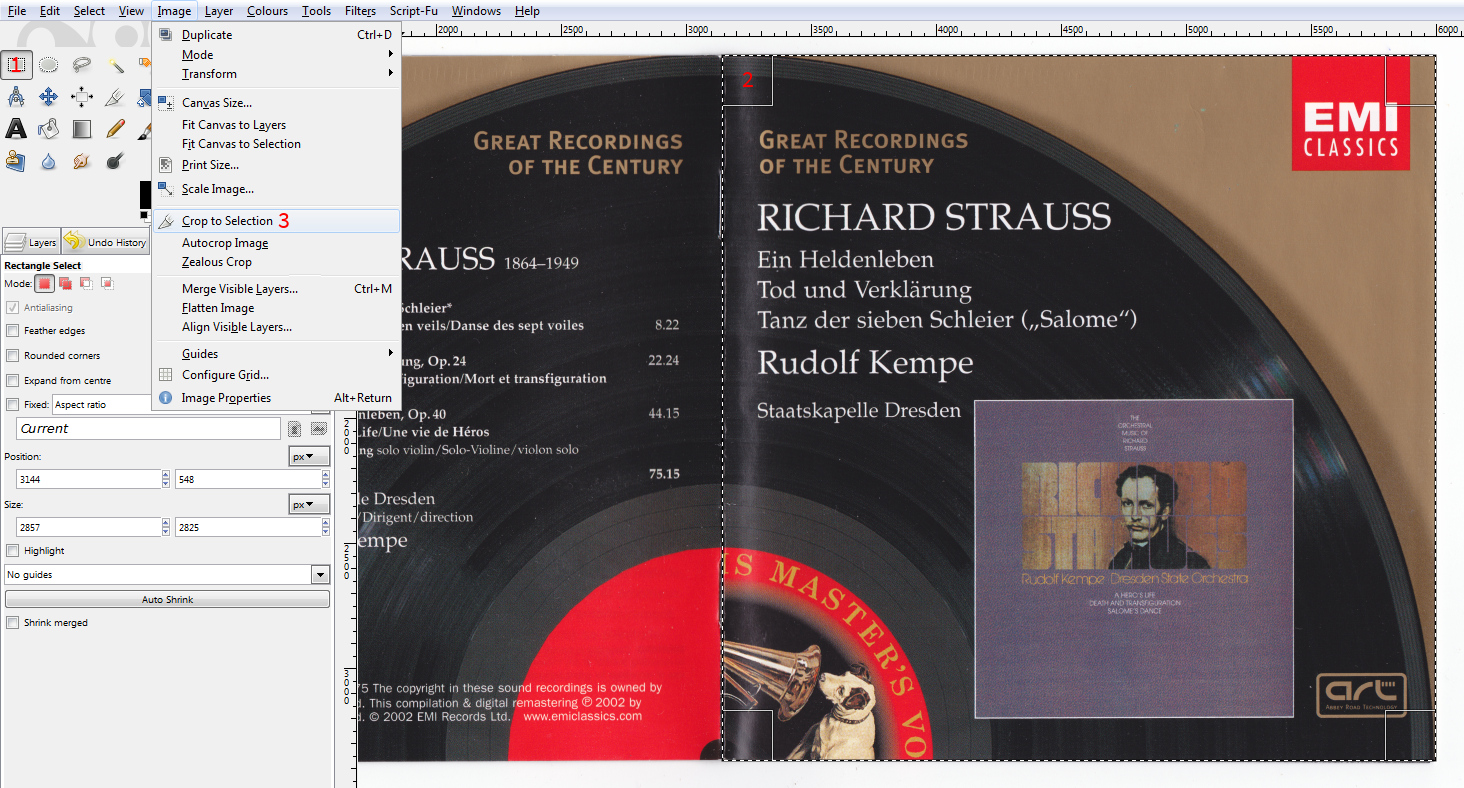
Now we’ll use the Resynthesizer plugin to repair bits of dirt, dust, small damage etc. First select all the bits you want repaired (you can add selections to the current selection by holding Shift while draging, or substract using Ctrl; you can also undo and redo selections with Ctrl+Z and Ctrl+Y). Then go to Filters → Enhance → Heal Selection.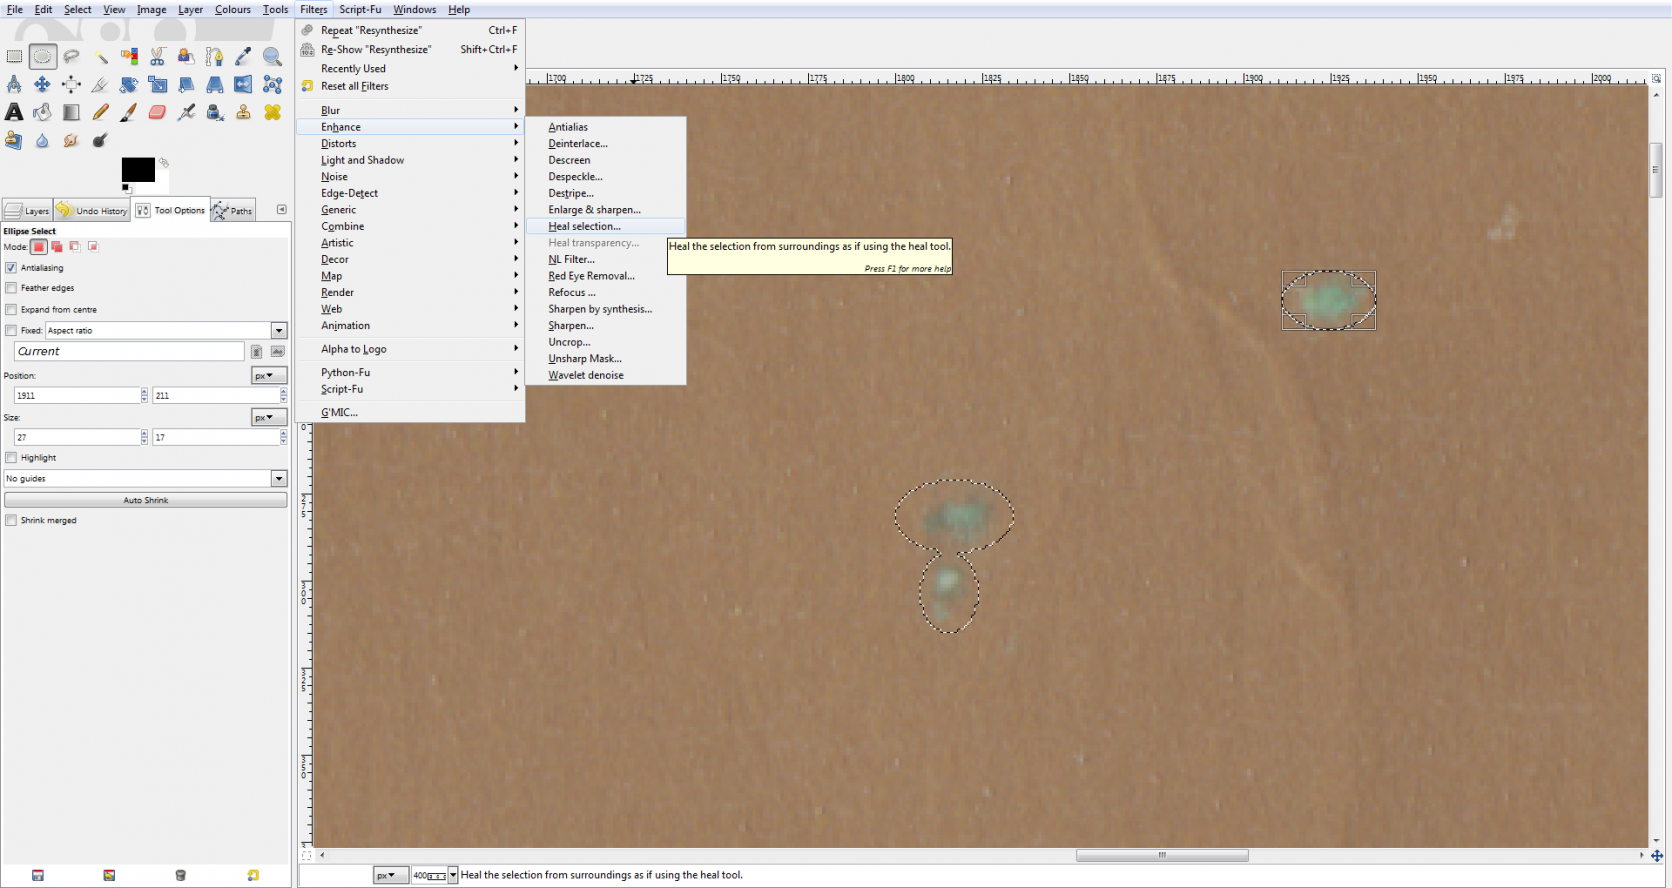
The default settings are usually good enough, but you can of course fiddle with them if you’re not satisfied with the results (see the blog-post Getting Around in GIMP — Heal Selection (Resynthesizer) for a more thorough introduction).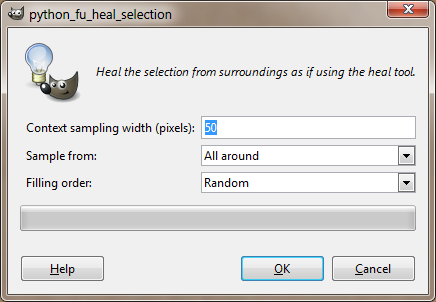
Next is the trickiest part: colour correction. It’s hard to trust your screen’s colours unless you have professionally calibrated it, so I’m usually reluctant to adjust too much. But in this case, the brown background is supposed to be gold (always a problematic colour for scanners), so I have to do something. In this case the answer was under Colours → Colour Balance. The changes are only applied after you click Ok and after that you can still undo any changes, so you can experiment with all options without having to worry about anything.
The other options in the Colours menu can be useful as well, but for now we’ll use one more: Go to Colours → Levels.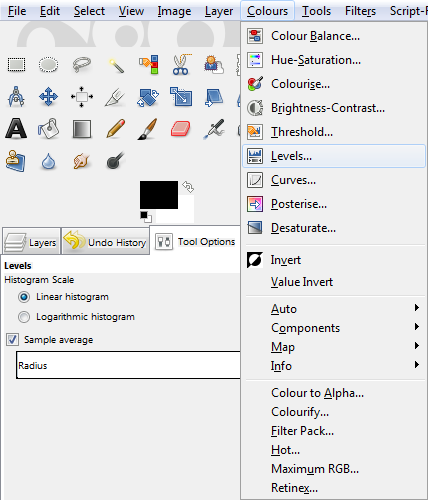
Beneath All Channels, next to Auto, there are three pipettes, a black one, a grey one and a white one. Simply click the white pipette and then click on an area in the image which should be white (like the letteres EMI). Then click the black pipette and something in the image that should be black.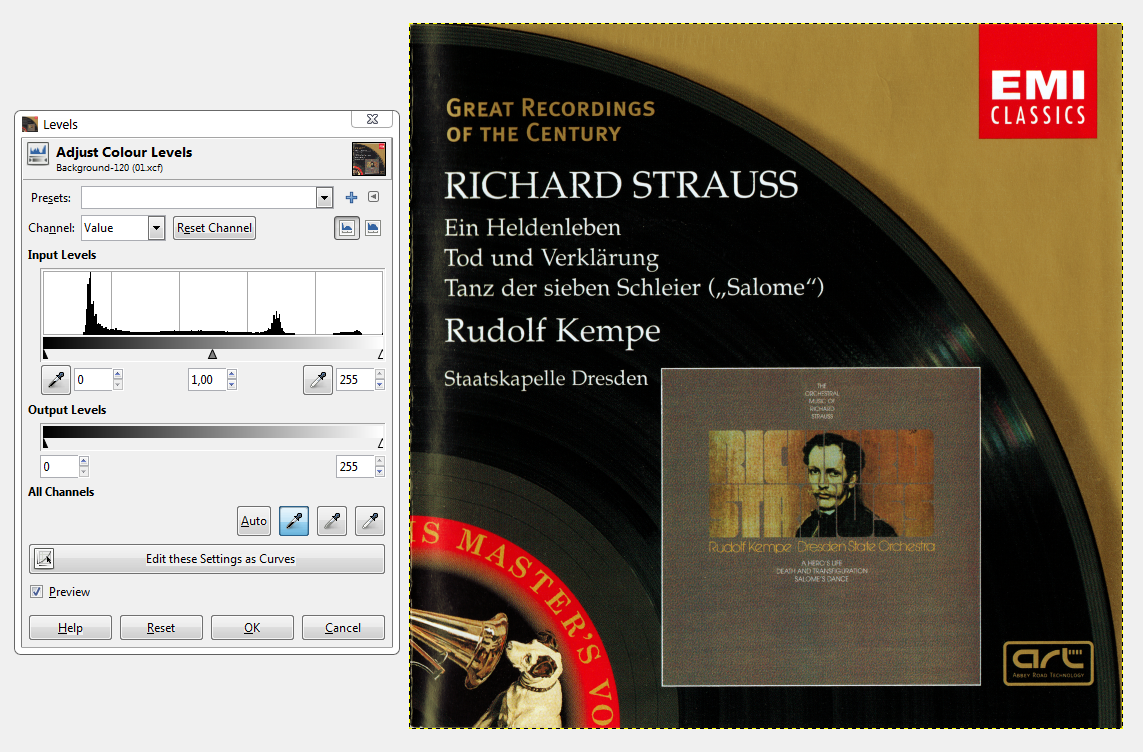
The image we have is huge, and that’s probably overkill. You can resize it to whatever you think convenient under Image → Scale Image.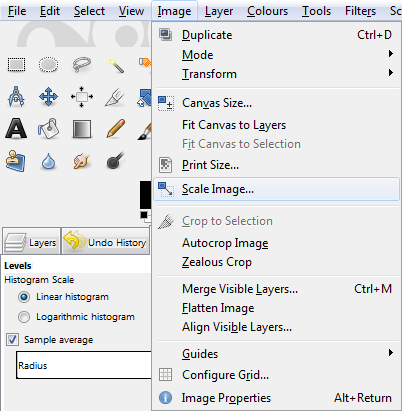
GIMP saves images in its own format, which is useful if you want to edit an image at a later date, but for MusicBrainz you’ll want to export an image to something more common. Go to File → Export to image.png or Export As…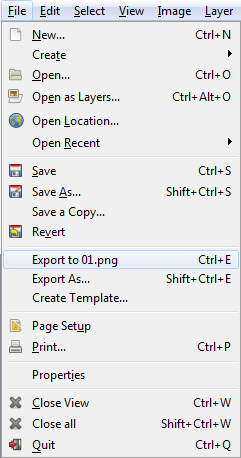
The Cover Art Archive allows uploading JPG, GIF, PNG and PDF files. PDF isn’t an image format and GIF is only useful for animated artwork, so the choice here is between JPG and PNG. JPG is lossy, which means that every time you save it, it loses some quality. It’s also ancient, and looking at a JPG image is the visual equivalent of listening to an 64kbps MP3 you downloaded in the Napster age. PNG is lossles, and because we’re archiving something, we don’t want to compromise for quality. The Cover Art Archive will automatically generate 500px and 250 px JPG files when you upload the original anyway.
If you append .png to the file name, GIMP will automatically save as png if you click Export. The default settings are good enough, so click Export again and you’re done.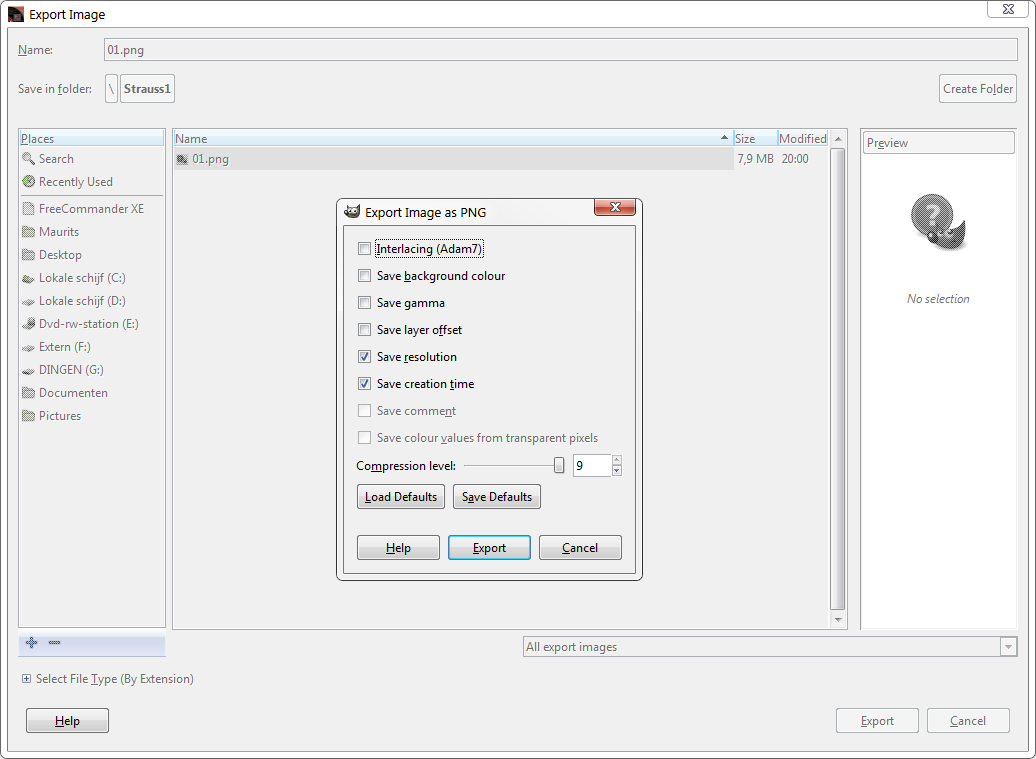
| How-To Pages | |
|---|---|
| Introductory Guides | Beginners' Guide · Creating an Account · Editing · Voting · Writing Edit Notes |
| Basic How-Tos | Adding an Artist · Adding Relationships · Using the Relationship Editor · Using Artist Credits · Adding a Release · Works · Events · Places · Series · Instruments · Areas |
| Specific How-Tos | Merging Releases · Merging Recordings · Removing Entities · Adding Cover Art · Identifying Labels · Splitting Artists · Adding Standalone Recordings · Adding Disc IDs · Cancelling Edits · Searching for Edits · Reporting a User · Reporting an Issue · Working with AcoustIDs · Tagging Files with Picard |